
In my UEFI Forum webinar, I demonstrated a utility function for stressing PCI Express ports at-scale using JTAG. Let’s walk through the source code and see how it works under the hood.
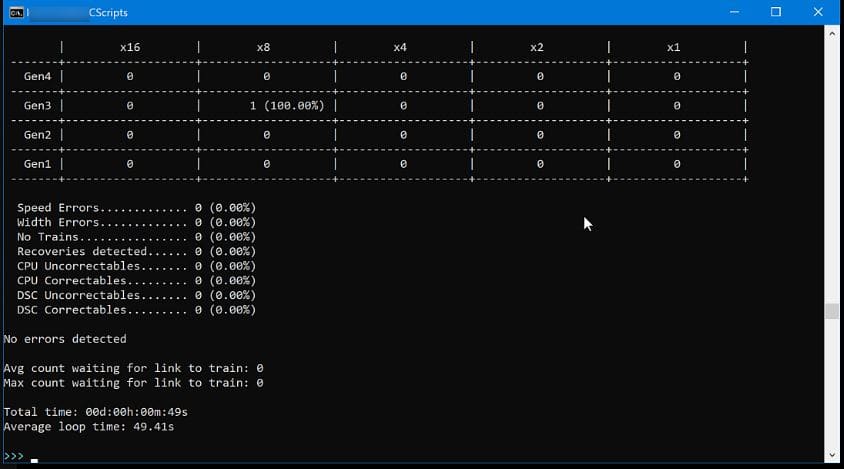
At 28 minutes into the UEFI Forum webinar, JTAG-based Debug & Trace, I did a demo of a CScript called “lt_loop”. lt_loop is an application that stresses PCI Express ports by exercising the Link Training & Status State Machine (LTSSM) on upstream and downstream PCI Express devices, looking for device, firmware and board marginalities. If you’re unfamiliar with the LTSSM, I’d recommend background reading such as Built-In Self Test (BIST) for PCI Expresss using Embedded Run-Control and What is Surprise Link Down (SLD)? The demo involved the CScript running on a remote PC host, communicating over Ethernet to a BMC that supports embedded run-control (JTAG plus sideband signals plus the In-Target Probe library). Note that it took over 49 seconds to run one basic link retrain loop:
Then, about 32 minutes and 30 seconds into the webinar, I demonstrated the same application, but this time running on a BMC as an On-Target Diagnostic (OTD). CScripts are written in Python, and run on a remote host PC, communicating to the CPU JTAG scan chain via a dedicated hardware probe such as the ASSET Arium ECM-XDP3e. But OTDs are written natively in C/C++, and run directly down on the BMC itself, without needing an Ethernet backhaul to a remote host. So, the OTDs run autonomously, thus gaining a tremendous advantage in speed, scalability and security compared to CScripts:
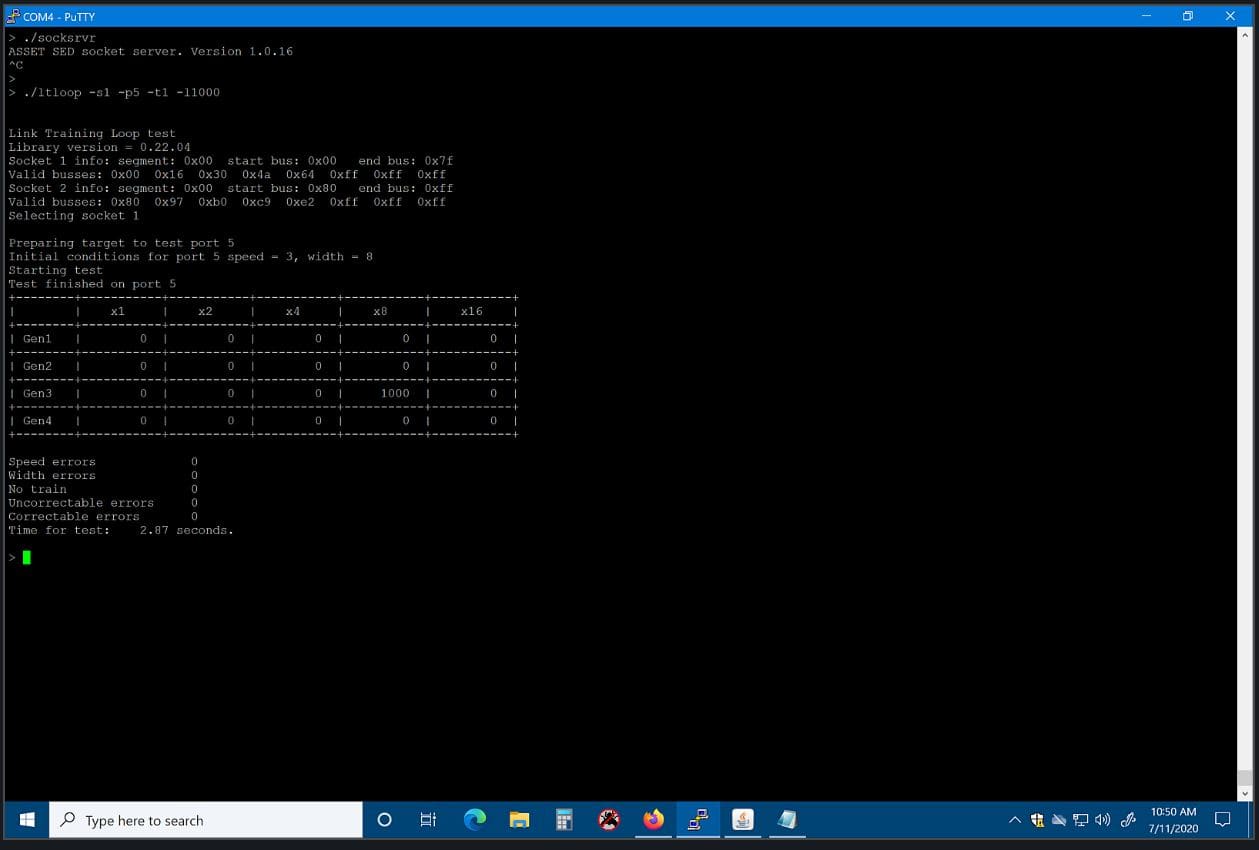
Note that with the OTD, the time taken to run 1,000 loops was 2.87 seconds. That is four orders of magnitude faster than the remote CScript. Incredible!
OTDs are applications running on the ASSET ScanWorks Embedded Diagnostics (SED) product. Basically, SED provides an API library of register, memory and I/O JTAG run-control based functions on which to develop OTDs. A sample of API are as follows:
EnterDebugMode

SetActiveCPU

ReadGPR

ReadMSR

WriteMemory
and so on. There are about 75 functions available for the OTD developer.
What follows is a tutorial on how to code to the SED API, complete with the source code for the ltloop OTD. Hold on, here we go!
Firstly, the complete source code for the ltloop demonstrated in the webinar is here: Download LtloopExample. Have a good look around, and you’ll see the basic structure of the application.
Let’s look in detail at main():
int main (int argc, char **argv)

{

         int numcores;

         int curcore;

         int numcpus;

         int curcpu;

         int iError = 0;

         bool pwrchk = true, scnsetup = true, savemodarch = true;

         int mHandle;

         FILE *UUTDiagsHexFile;

         char ver[200];

uint64_t msr;

uint64_t regdata;

int i;

struct timespec start_time;

struct timespec end_time;

double secs;

uint32_t bus;

uint32_t dev;

uint32_t fun;

ai_ITPtopology_t topo;

uint16_t curCPU;

UUTDiagsHexFile = NULL;

printf("\n\nLink Training Loop test\n");

iError = parseArgs(argc, argv);

if (iError != 0)

{

usage();

return iError;

}

ai_GetLibraryVersion(ver);

printf("Library version = %s\n", ver);

AI_pdcselector pdctarget = AI_pdc_0;

if ((iError = ai_mOpen(pdctarget, 1, &mHandle)) != AI_SUCCESS)

{

printf ("\nOpen ERROR: %s Channel %i\n" , ai_ErrorToString(iError), pdctarget);

return 1;

}

if ((iError = ai_mSetTargetCPUType(mHandle, AI_sandybridge)) != AI_SUCCESS)

{

printf ("\nSetTargetCPUType: ERROR: %s Channel %i\n" , ai_ErrorToString(iError), pdctarget);

return 1;

}

ai_mConfig (mHandle, 100, UUTDiagsHexFile, 0x10000LL, pwrchk, scnsetup, savemodarch);

iError = ai_mGetITPScanChainTopology(mHandle, &topo, true);

if (iError != AI_SUCCESS)

{

      printf ("\nERROR getting target topology: %s\n" , ai_ErrorToString(iError));

      return iError;

    }

numcpus = topo.tck[TCK_ZERO_POS].numcpus;

if ((m_socket < CPU_ZERO_POS) || (m_socket > numcpus))

{

printf("Invalid socket number, must be between %hu and %hu\n", CPU_ZERO_POS, numcpus);

return -1;

}

//Halt all cores in all CPUs

for (curCPU=CPU_ZERO_POS; curCPU < (numcpus + CPU_ZERO_POS); curCPU++)

{

if ((iError = ai_mSetActiveCPU(mHandle, curCPU)) != AI_SUCCESS)

{

printf ("\nSetActiveCPU: ERROR: %s Socket %hu\n" , ai_ErrorToString(iError), curCPU);

return 1;

}

ai_mSetActiveCore(mHandle, CORE_ZERO_POS);

ai_mSetActiveThread(mHandle, THREAD_ZERO_POS);

if ((iError = ai_mEnterDebugMode(mHandle)) != AI_SUCCESS)

{

printf ("\n EnterDebugMode: ERROR: %s Socket %hu\n" , ai_ErrorToString(iError), curCPU);

return 1;

}

}

//TODO

//Check return values:

ai_mIOSFTAPinit(mHandle);

m_bus0 = 0;           //Start with bus 0 for bus discovery

//Get TAP ownership for all TAPs, overview will use all TAPs (CPUs)

for (curCPU=0; curCPU < numcpus; curCPU++)

{

m_peciCPU = curCPU;

ai_mIOSFTAPownership(mHandle, true, curCPU);

}

//Prepare the target and get the bus numbers for each socket

//We need the bus min/max for first socket in order for second socket to work

for (curCPU=0; curCPU < numcpus; curCPU++)

{

m_peciCPU = curCPU;

prepTarget(mHandle, 0, 0, 0);  //attempt to "unhide" devices; b/d/f is ignored

getBusNumbers(mHandle, curCPU);

}

printf("Selecting socket %hu\n", m_socket);

if ((iError = ai_mSetActiveCPU(mHandle, m_socket)) != AI_SUCCESS)

{

printf ("\nSetActiveCPU: ERROR: %s Socket %hu\n" , ai_ErrorToString(iError), m_socket);

return 1;

}

m_peciCPU = m_socket - CPU_ZERO_POS;

ai_mSetActiveCore(mHandle, CORE_ZERO_POS);

ai_mSetActiveThread(mHandle, THREAD_ZERO_POS);

clock_gettime(CLOCK_MONOTONIC, &start_time);

port2bdf(m_port, &bus, &dev, &fun);     //Convert the command line option -p<n> to bus, device, function

do_test(mHandle, numcpus, bus, dev, fun);

clock_gettime(CLOCK_MONOTONIC, &end_time);

secs = (double)(end_time.tv_sec - start_time.tv_sec) + (double)(end_time.tv_nsec - start_time.tv_nsec) / 1000000000.0;

printf("Time for test: %7.2f seconds.\n\n", secs);

ai_mClose(mHandle);

return iError;

}
Most OTDs have the same structure within the main routine. The platform is initialized for run-control with the following API, in sequential order:
ai_mOpen

ai_mSetTargetCPUType

ai_mConfig

ai_mGetITPScanChainTopology

ai_mSetActiveCPU

ai_mSetActiveCore

ai_mSetActiveThread
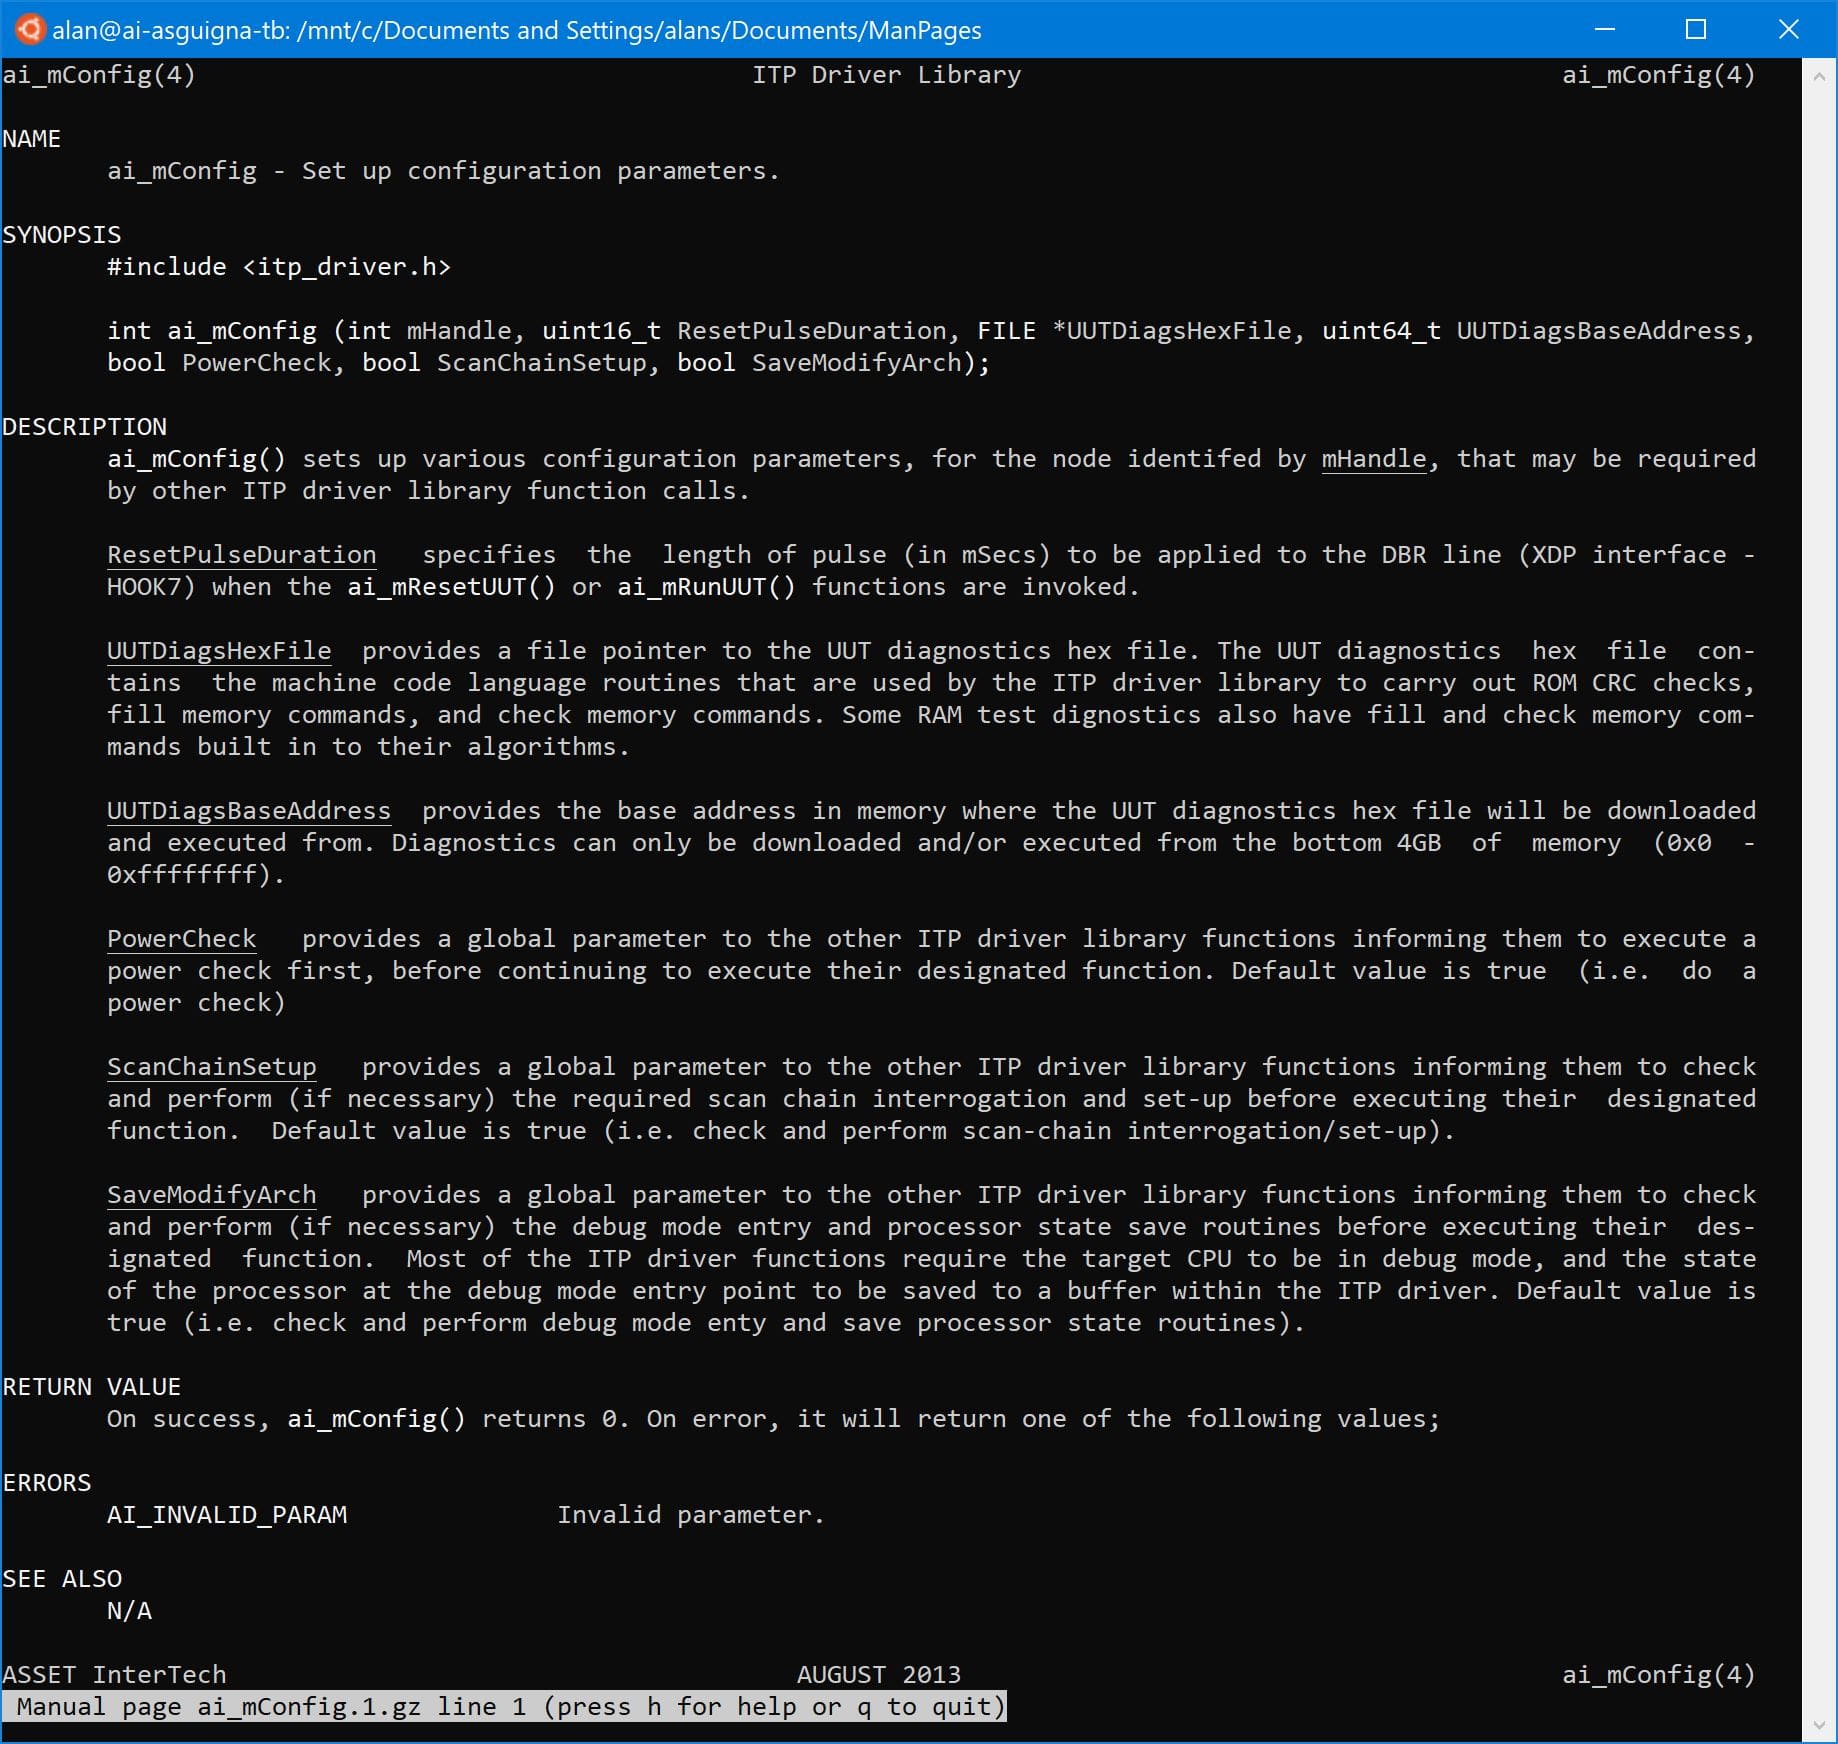
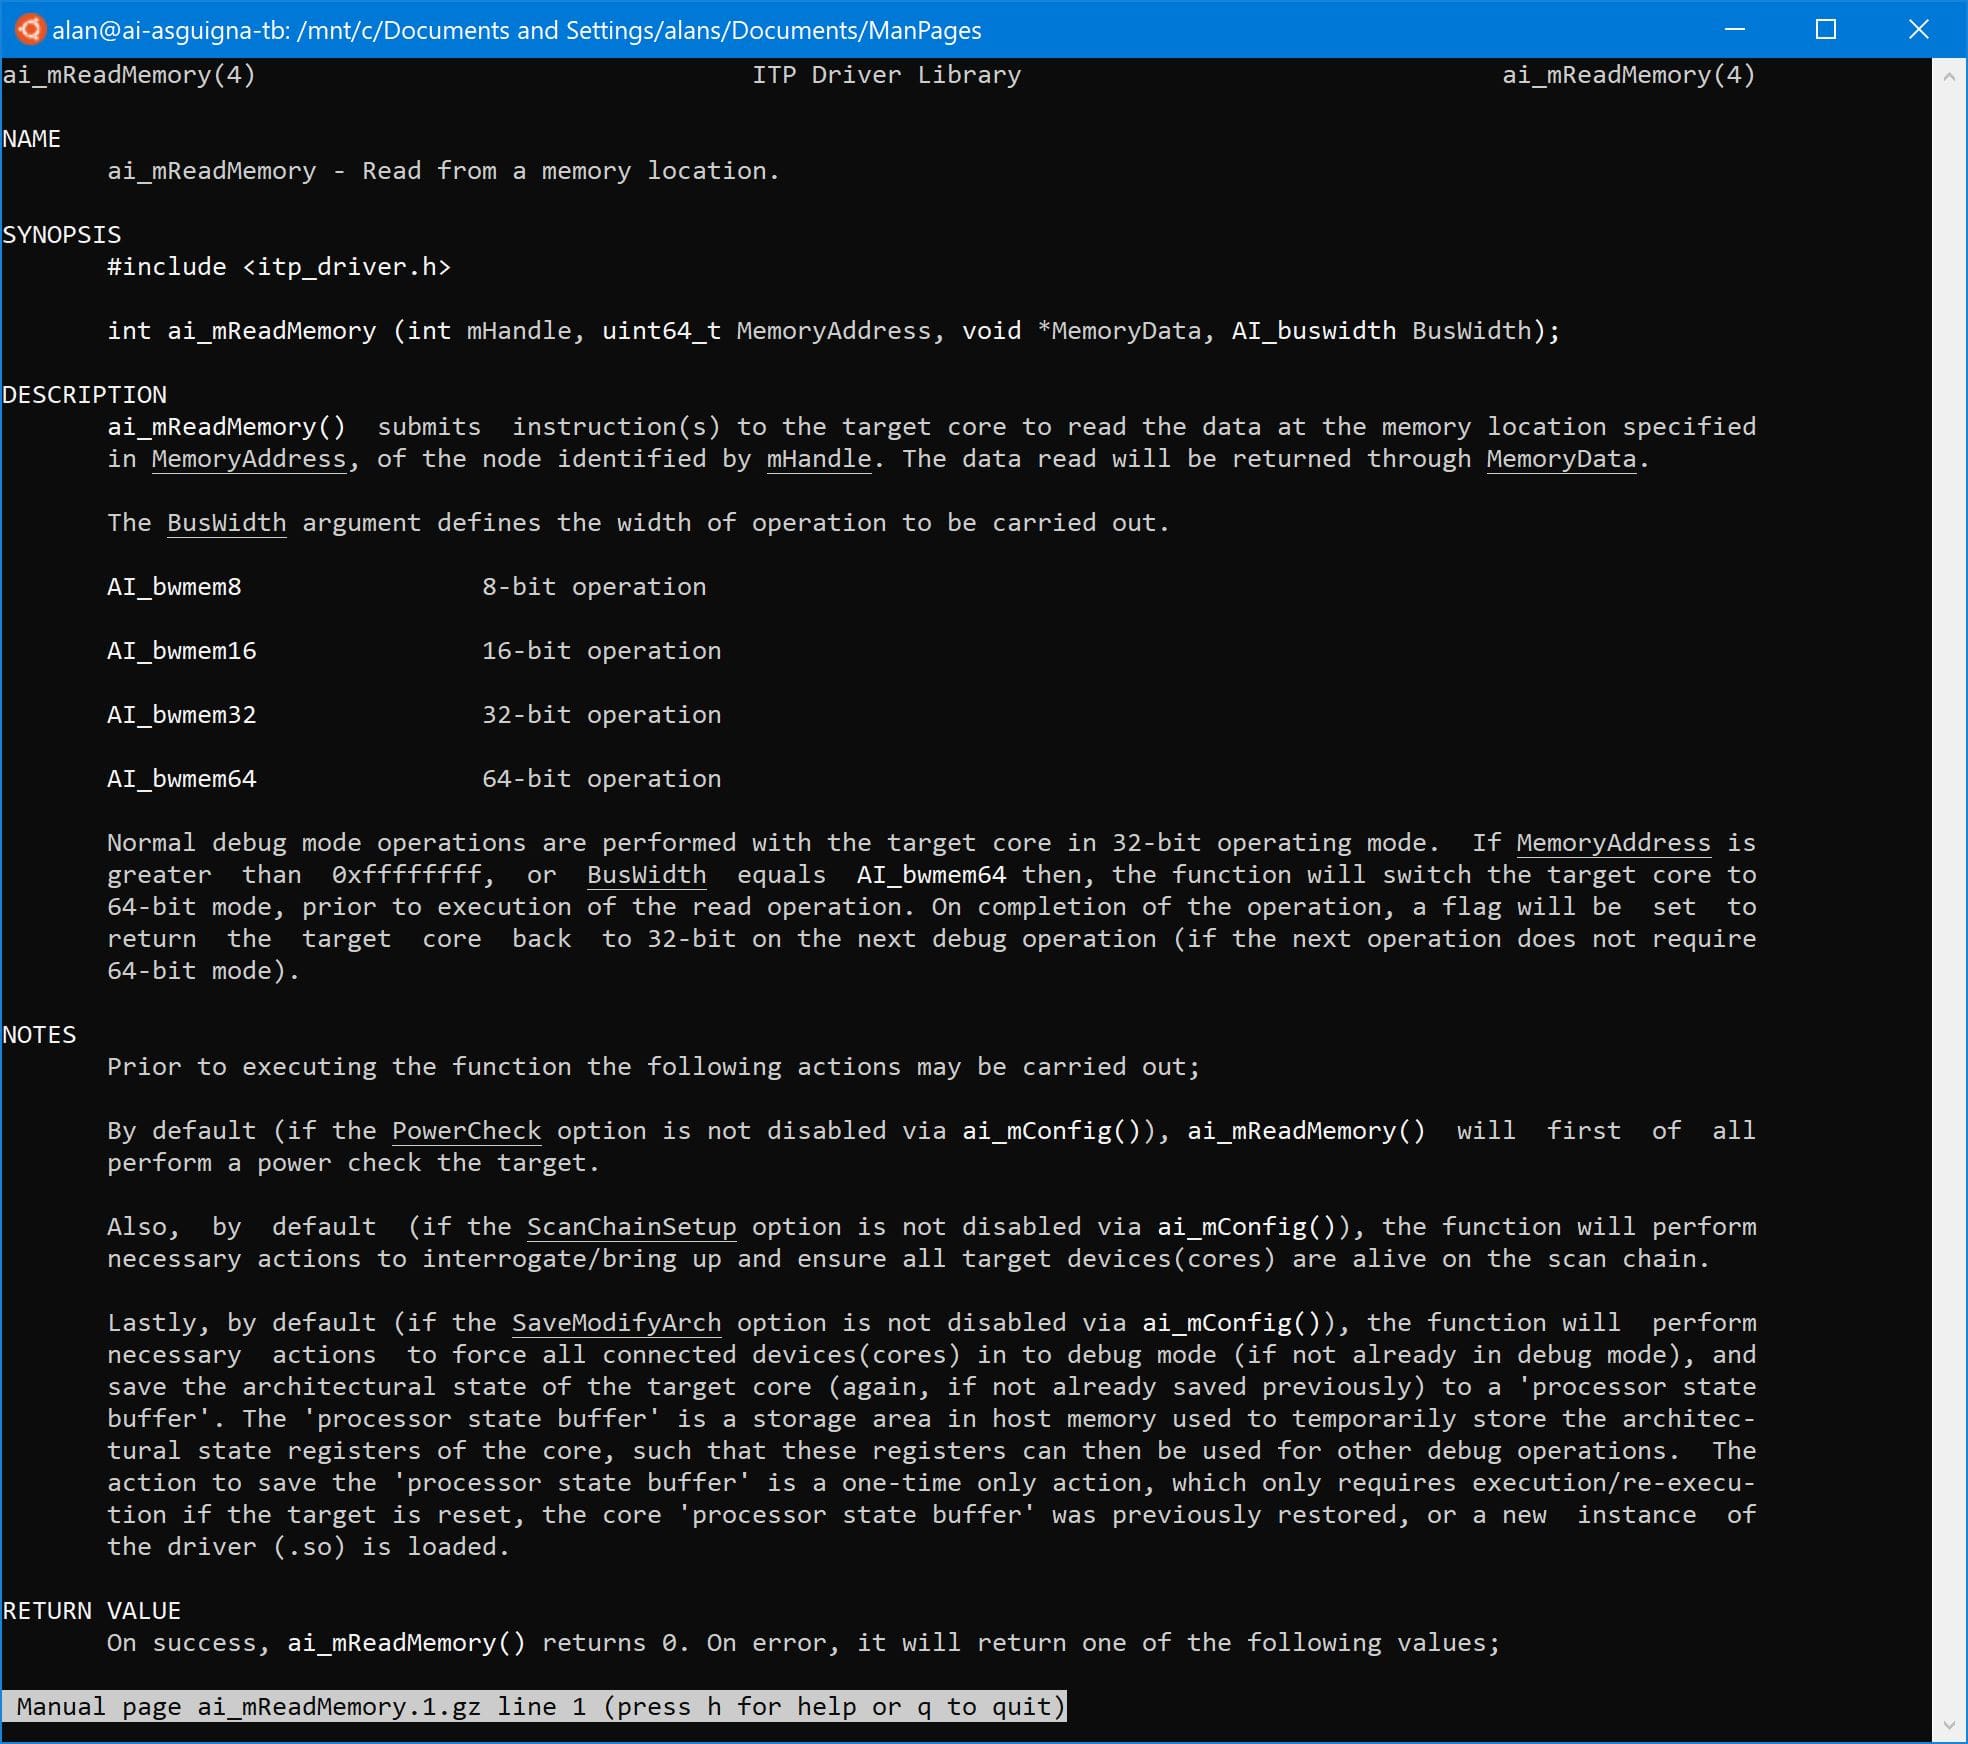
ASSET provides man pages that are easily used within the development environment to document the operation of the library. For example, below are excerpts from a couple of the man pages for helpful functions:
After the main platform initialization is done, ltloop does some specific work to provide sideband (i.e. not run-control based) access with the IOSF routines in main(). Although there are references to PECI in the code, in this instance JTAG is still used as the physical access mechanism to the meta state machine, but not run-control. Then port2bdf is called (a handy utility function to translate the port number from the command line to bus/ device/ function). Finally do_test is launched, which in turn launches the lt_loop function, where all the heavy lifting is done.
Whew! That’s it for now. Next week, we’ll do a deeper dive into the operations of the main lt_loop and other functions.