Five weeks ago I placed an order for an UltraZed-EG Starter Kit, which in case you don’t know, is a prototype and evaluation system based on the Xilinx Zynq® Ultrascale+™ MPSoC device family. My objective is to use the kit as a tool to learn about the Zynq Ultrascale+ MPSoC by connecting the SourcePoint® debugger. First steps are to get the target platform booting.
The kit was on back order with delivery expected in two weeks. After waiting until three weeks had completely passed. I contacted sales support and got a promise that someone would get back to me. Nothing! By the middle of the fourth week, I contacted someone I had previously done business with in the online sales team, and two days later I had my kit in hand. Thanks, Caroline! Last week I took delivery of an UltraZed-EG development kit from Avnet, and opened it up to inventory the contents. I was busy with the Zedboard blog/vblog, other targets, normal business, and knew I could get back to it in a little while.
After thinking about this target system the entire weekend, I couldn’t wait any longer, so I cleared some time and started getting setup on Monday. I will connect the evlaution kit to the SourcePoint® ARM debugger from ASSET InterTech just as I had with Zedboard.
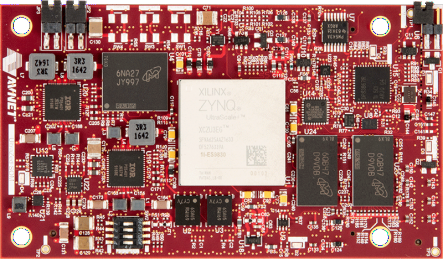
I should have realized that this was not going to be as smooth as the Zedboard setup when I saw the 4×8 Getting Start Card with 8 point font. The kit comes with a UltraZed-EG System-on-Module (SOM)
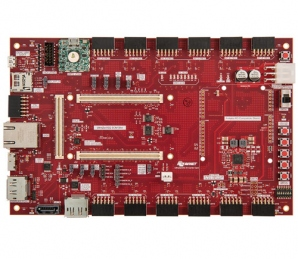
and IO Carrier Card with all the cables and power supply necessary to get running. The kit also contained a separate fan assembly for the Zynq Ultrascale+ SoC.
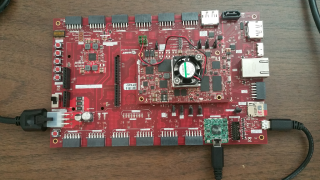
Naturally, there was yet another set of USB/UART drivers that needed to be downloaded and installed. After attaching the fan and connecting the SOM to the IO Carrier card. I was ready to set the boot switch setting, connect the USB/UART cable, connect a PUTTY terminal, and power up the system. There was also a jumper on the carrier card that needed installing. With that accomplished, I slide on the switch and got nothing except a red LED. No fan power. So I went to the forum at ultradzed.org and found that the SOM is shipped with a shunt installed on JP1 that prevents the board from powering up. It took some time to find the jumper, but with it removed the system came to life when power was applied.
Excited to see that the system was alive, I waited patiently for console output that would indicate the Linux system on the SD card, was booting. Nothing appeared. After powering down the sytem, I extracted the SD card and did a verification of the SD contents on my laptop. The Linux OS and file system were in place.
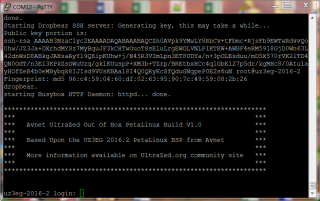
I followed the directions from Silicon Labs, except I wasn’t using Tera Term. When the Silicon Lab driver installs, there are two COM Ports: one that is enhanced, and one standard. For my system that was COM13 and COM12. My PUTTY setup was connected to the enhanced port as recommended by the install guide. On a guess, I switched to the standard COM port and tried powering on again. Finally, I could see that the system booted.
Now I was ready to connect the SourcePoint debugger probe into the JTAG header on the IO Carrier Card. The problem is, there is no obvious pin 1 location, and my cable that I used for the Zedboard blogs is not keyed. After looking at the schematics and board layout for the pin 1 location, I submitted the question to the forum. While waiting for a reply, I got out the multi-meter and looked for the side of the connector that was grounded on each pin indicated the odd side of the connector which would provide the information needed to connect the probe. I then connected the probe and started SourcePoint with no problem. About two hours after submitting the query, I got the following from the forum. “Pin 1 is the one closest to the J6 silk screen identifier. If you look very closely at the pin, you will see a white bar indicating "1" partially obscured by the ground track going to the pin.”
Starting up SourcePoint, and creating a project would normally require a target configuration file (TC), but as this is a new target, there was not one. However, ASSET has connected SourcePoint to other Cortex-A53 targets, and I didn’t expect any problems. When there isn’t a TC file, we can load a default configuration, which causes the tool to scan the JTAG and DAP interfaces to discover what is connected. In this case, the JTAG id came back as unknown but reported the id number. In this iteraction, a table is opened for the user to submit data about the device id.
I sent the JTAG id back the factory to get information about the JTAG IR length required for the table. I was told that it wasn’t a Coretx-A53. Thankfully, we have a team in Ireland working on the UltraZed looking a JTAG run-control, and it was suggested that I contact them about this ID. They are six hours ahead, and the factory is three hours behind. So I sent off an email to my colleagues in Ireland, knowing that I would need to wait a day for a response.
While waiting for a response, I decided to try the Xilinx tool chain route. I found the Xilinx tutorial and the detailed Getting Started guide. The ultrazed.org detail Getting Started Guide directed me to install the Board Definitions Files for the UltraZed-EG Starter Kit in Vivado 2016.4 and to get/install the Vivado 2016.4 license using the certificate provided in the kit.
I did as required, installing the files and the license. I used the Vivado License Manager to verify the license was installed correctly. I then proceeded to create a new Vivado project. Part of the project definition is selecting the default part and the board files. However, I could not find the board files that I had installed. Back to the forum. It appears that I’m not the only user having this problem. There wasn’t anything new in the discussion, but I used the data to verify my steps. It took hours to setup and verify compairing my actions against the thread in the forum. Still, I could not create a project for the UltraZed.
In the tutorial I downloaded, and with the experience, I had with the Zedboard, I located a prebuilt project file for the UltraZed and loaded it. It was there that the Vivado tools indicated that I could not load the project and perhaps I needed an upgrade. I looked at what was enabled for the Vivado Web version; I don’t recall the exact product version name, but it didn’t have the ability to select the Zynq Utlrascale+ board/devices. I then upgraded to the Vivado Design Suite and after that, I could see the Board Reference files and complete the tutorial to build the hardware system. With my experience with the Zedboard, I knew that if I could build the hardware system I could export the design to the Xilinx SDK and build the BSP and that was my objective for the moment.
My colleague (Pauric) got back to me and related the same exact experience when attempting to plug-in the probe with the same exact ID code. I was told to refer to the TRM for the Ultrascale (UG 1085) for a list of JTAG ID codes. I had not downloaded the TRM yet. “The IDCODE that you are getting (0x08e20126) is 0x4710093 shifted left by 1 bit. So you are seeing what I was seeing. There are 2 devices in the chain. There is the XCZU3CG Device with an IDCODE of 0x4710083, and there is another device which is in BYPASS (1 bit in the DR). I believe that the other device is what Xilinx calls a dummy dap in their documentation.”
He contacted the Avnet UltraZed forum; they redirected him to the Xilinx forum. The Xilinx forum provided a Tcl file that could be exercised from the XSCT console in the Xilinx SDK to enable the “real” DAP.
For now, I will continue down the BSP route in the SDK, as I did with the Zedboard before I attempt to plug in the probe again. Then come back to exercising the Tcl file if necessary. Back to work and squeezing in time for the UltraZed Board Chronicles. I don’t know if it is that the Zedboard was more mature when I first got it, but the powerup of the Zedboard, getting the SourcePoint debugger attached, and going through all the tutorials took about two days. It took that long just to get the UltraZed powered up. I hope things go smoother next week on the UltraZed board.


