As I continue the journey to learn about the internals of UEFI and to debug it with SourcePoint, I encounter some issues doing the firmware build.
Last week, I played around with the UEFI shell, and then updated the firmware on my Minnowboard to the latest release (v0.94). Then, I used SourcePoint to look at disassembled code when the platform was sitting in the UEFI shell, waiting for keyboard input. From last time, we can see a number of “INT 3” instructions, with opcode CC.
I wanted to explore this a little more, but decided to be more aggressive and go ahead and try for a full UEFI EDK II firmware build. My hope was to successfully create the symbol files to be used as input to SourcePoint. With this in place, I can use our tool to do source-level debugging, set breakpoints within modules such as DxeMain, use the Trace capabilities, and so on. Debug is so much more powerful when source code and symbols are available.
Luckily, the Release Notes for Release 0.94 of the Minnowboard UEFI firmware are very clear when it comes to doing a build. The steps are broken down into the following:
- Download the complete source from Tianocore using Git.
- Get the binaries (the parts that are not available in source code).
- Set up the build environment (in this case, Visual Studio 2013).
- Install the needed IASL compiler.
- Do the build.
I could spend hours describing the detail behind each step, but I’ll leave that for follow-up blogs. I’ll simply describe the challenges and issues I ran into here.
#1 was easy. All that was required was to download Git from www.git-scm.com, and follow the included instructions. Git is a version control repository and Internet hosting service. It was very easy to use and allowed me to access the needed source files in my Windows PC workspace.
The binary files needed were another story. I was later to find that my anti-virus blocked the downloading of some of these files (silently, of course). Many hours were spent trying to find out why the build was not completing. For example, the anti-virus program did not like the SmmControl.efi macro.
Getting my old dual-core Windows PC to install Visual Studio 2013 took about two hours. Microsoft, of course, initially downloaded the newest Visual Studio 2015 Community – despite my having accessed the Visual Studio 2013 page – but Visual Studio 2015 did not work. I had to download and install Visual Studio 2013 explicitly before I could make any progress.
Another tip for those who might follow in this path: you do want to download the OpenSSL source code. Don’t try to skip this step. I did, and it cost me another hour.
The IASL compiler is obtained from the ACPICA (Advanced Configuration and Power Interface Component Architecture) website. Note to self: I want to dig into this a little later.
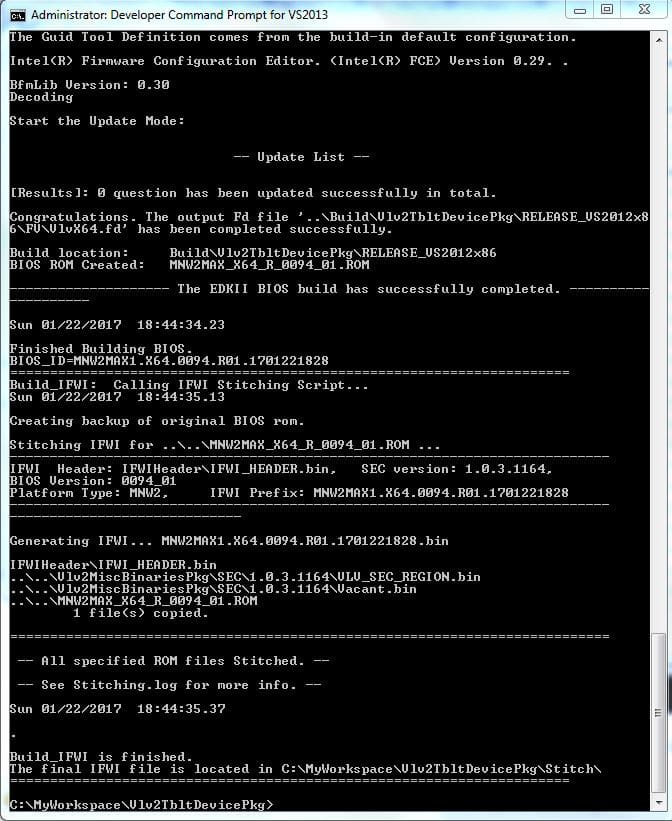
After all this, doing the build was easy. From “C:\MyWorkspace\Vlv2TbltDevicePkg” it was a simple matter of typing into the Windows command window “Build_IFWI.bat MNW2 Release”, and waiting about 20 minutes.
The final 8MB firmware binary image MNW2MAX1.X64.0094.R01.17601221828.bin appears in the directory “C:\MyWorkspace\Vlv2TbltDevicePkg\Stitch”.
This coming week, I’ll be pulling the symbols into SourcePoint, and doing some hardware-assisted source-level debug!


